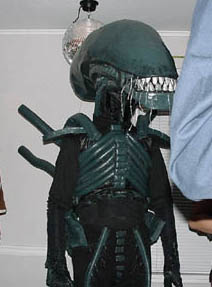
Here is the mask as it is at the time of writing.

 After finishing it I have begun testing a new base layer to give it a glossier finish. Before doing this some alterations and additions need to be added to the Alien helmet.
 Here is the right hand side (as you can see) which still has the full black coat that I applied on Halloween. It is obvious that it needs a better paint job, the one at present was applied on Halloween using one coat from an airbrush. If you look closely you can even see the news print on the paper-ma-Che underneath the paint. You can also see that the very back of the head needs rounding off just a little more. You may have also noticed that it is missing a few teeth (I began t o remove them after Halloween in preparation for the alterations to come.
 The new layers of paint should help smooth out the surface as it is a bit rough at present. I hope these shots also help to illuminate some of the dark spots in the tutorial I have given. The void at the base of the mask shows where I have extended it beyond the initial framework.


